So parts have arrived. But been super busy with work and helping friends out. Redid the brakes on a friend's subaru, some plumbing for my parents, built up the Lynskey road bike for another friend.
On top of all that I still have to do the brakes on my own Subaru, and also replace the steering U-joint too.
This is the progress so far for my 2011 Rocky Mountain Element Team RSL
LIST
Showing posts with label MTBR. Show all posts
Saturday, April 28, 2012
Tuesday, April 10, 2012
TECH: Part 1 of 4 - How to do an annual service on Fox Forks
So for many parts of the world spring is fast approaching or is already here. This means you probably need to get your ride tuned up for the upcoming race season. Hopefully you also kept your body tuned up too.
This multi-day post will focus on what you need to do to service your Fox 32mm F-series fork to ensure consistent reliable performance for many years.
This guide is just the full blown annual service. It will not explain how to fix problems and assumes your fork was in proper working function before this service.
Just remember routine regular maintenance means less cost over the long run as you don't need to replace expensive parts to get it working again.
First order of business is to gather up on supplies.
Walmart for this:
Then go to an autoparts store (Canadian Tire, Parts Source, Pep Boys, Autozone, etc). Go ask the guy at the counter for vacuum caps. You want the small assorted package on the right. You will trim the rubber cap end off so it becomes a plug/adapter for the syringe to the FIT dampener cartridge.
Buy new seals. For 2012 Fox contracted design of new seals to SKF industries. Whatever you do make sure you buy these new seals as they are miles better than the previous ones for sealing and a lot less drag.
Buy fork oil aka Fox Float fluid. Depending on year of your fork you either need 7.5wt or 10wt.
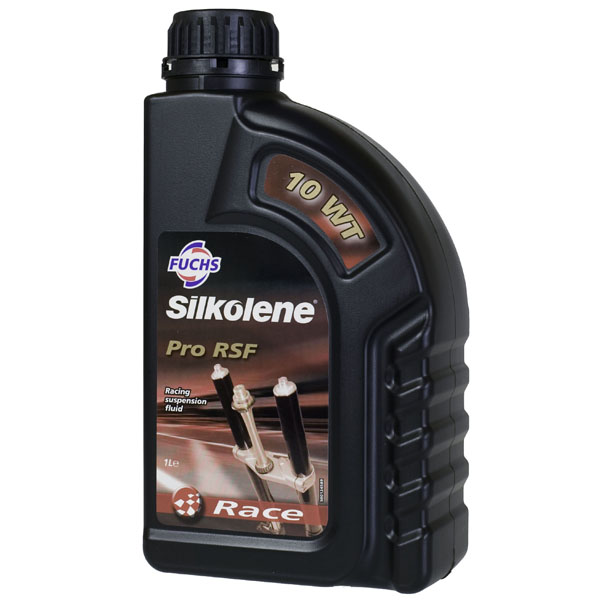
Fox Flat 10wt Red is the same as silkolene pro rsf 10wt and probably a lot cheaper. Call around to various motorcycle dealers and inquire.
I went with Redline suspension oil as I have been using their oils for a very long time when I used to race cars. If you live in the greater Toronto Area you can buy it from JRP. If you go the redline route you will need to buy their heavy weight and medium weight and mix the two so that you get the same viscosity index as 10wt Fox fluid.
Peter Verdone talks about how to mix the two redline oils together to get the same viscosity as Fox 7.5wt you need. If you want to read up about the theory of dampers and oil viscosity go here: http://www.peterverdone.com/wiki/index.php?title=Suspension_Fluid
To ease in the math on how to get Redline Medium + Redline Heavy to be at the same viscosity as Fox 7.5wt you need to mix:
81.1% Redline Medium + 18.9% Redline Heavy = Fox 7.5wt.
If you have a newer Fox fork it will call for Fox 10wt or silkolene pro rsf 10wt. Silkolene Pro RSF 10wt has 47.36 cSt @ 40C. Therefore to replicate this with redline oil you need to mix:
42% Redline Medium + 58% Redline Heavy = Fox 10wt = silkolene pro rsf 10wt
(reference Suspension Oil Blend Viscosity Calculator)
Tools you are going to need:
Take your fork and go wash it with hot soapy water. You don't want to have dirt and sand fall into critical areas when you take apart the fork. Towel dry your fork or allow to dry overnight.
with all the loose bolts, thread them back into where they came from so you don't loose them. Here is a pictorial guide on what you need to do.
Next post will discuss taking apart your fox fork to get to the seals.
This multi-day post will focus on what you need to do to service your Fox 32mm F-series fork to ensure consistent reliable performance for many years.
This guide is just the full blown annual service. It will not explain how to fix problems and assumes your fork was in proper working function before this service.
Just remember routine regular maintenance means less cost over the long run as you don't need to replace expensive parts to get it working again.
First order of business is to gather up on supplies.
Walmart for this:
Then go to an autoparts store (Canadian Tire, Parts Source, Pep Boys, Autozone, etc). Go ask the guy at the counter for vacuum caps. You want the small assorted package on the right. You will trim the rubber cap end off so it becomes a plug/adapter for the syringe to the FIT dampener cartridge.
Buy new seals. For 2012 Fox contracted design of new seals to SKF industries. Whatever you do make sure you buy these new seals as they are miles better than the previous ones for sealing and a lot less drag.
Buy fork oil aka Fox Float fluid. Depending on year of your fork you either need 7.5wt or 10wt.
Fox Flat 10wt Red is the same as silkolene pro rsf 10wt and probably a lot cheaper. Call around to various motorcycle dealers and inquire.
I went with Redline suspension oil as I have been using their oils for a very long time when I used to race cars. If you live in the greater Toronto Area you can buy it from JRP. If you go the redline route you will need to buy their heavy weight and medium weight and mix the two so that you get the same viscosity index as 10wt Fox fluid.
Peter Verdone talks about how to mix the two redline oils together to get the same viscosity as Fox 7.5wt you need. If you want to read up about the theory of dampers and oil viscosity go here: http://www.peterverdone.com/wiki/index.php?title=Suspension_Fluid
To ease in the math on how to get Redline Medium + Redline Heavy to be at the same viscosity as Fox 7.5wt you need to mix:
81.1% Redline Medium + 18.9% Redline Heavy = Fox 7.5wt.
If you have a newer Fox fork it will call for Fox 10wt or silkolene pro rsf 10wt. Silkolene Pro RSF 10wt has 47.36 cSt @ 40C. Therefore to replicate this with redline oil you need to mix:
42% Redline Medium + 58% Redline Heavy = Fox 10wt = silkolene pro rsf 10wt
(reference Suspension Oil Blend Viscosity Calculator)
Tools you are going to need:
- Metric allen key set (hex keys)
- Small rubber mallet or block of wood
- old ice cream container or yogurt container to contain the used oil
- torque wrench
- hex bits for torque wrench
- metric wrenches (8mm and 10mm)
- shock pump
Take your fork and go wash it with hot soapy water. You don't want to have dirt and sand fall into critical areas when you take apart the fork. Towel dry your fork or allow to dry overnight.
with all the loose bolts, thread them back into where they came from so you don't loose them. Here is a pictorial guide on what you need to do.
Next post will discuss taking apart your fox fork to get to the seals.
Tuesday, March 13, 2012
Part 4: Antiseize
Use antiseize for the following:
TYPICAL PERFORMANCE
An anti-seize lubricant used on a bolt helps to develop greater clamp load for the same torque compared to an unlubricated bolt. An additional benefit is greater uniformity in clamp load among a series of bolts. The relationship between torque and clamp load is expressed in the following equation:
T = K x F x D
T = Torque (N·m, lb.in, lb.ft)
K = Torque coefficient or nut factor, determine experimentally
F = Clamp load (N, lb.)
D = Nominal diameter of bolt (mm, in.)
Torque coefficient, k:
SAE grade 5, class2, phosphate coated steel nuts & bolts = 0.16
SAE grade 5, class2, phosphate coated steel nuts & bolts, solvent cleaned, not lubricated = 0.19
*assume 0.35 for titanium and 1.2 for aluminum
reference Loctite C5-A tech spec
- threaded bottom bracket cups
- centreloc shimano brake rotor lock ring
- cassette lock ring
- can be used to aid press fit assemblies to help installation
TYPICAL PERFORMANCE
An anti-seize lubricant used on a bolt helps to develop greater clamp load for the same torque compared to an unlubricated bolt. An additional benefit is greater uniformity in clamp load among a series of bolts. The relationship between torque and clamp load is expressed in the following equation:
T = K x F x D
T = Torque (N·m, lb.in, lb.ft)
K = Torque coefficient or nut factor, determine experimentally
F = Clamp load (N, lb.)
D = Nominal diameter of bolt (mm, in.)
Torque coefficient, k:
SAE grade 5, class2, phosphate coated steel nuts & bolts = 0.16
SAE grade 5, class2, phosphate coated steel nuts & bolts, solvent cleaned, not lubricated = 0.19
*assume 0.35 for titanium and 1.2 for aluminum
reference Loctite C5-A tech spec
Labels:
222MS,
243,
262,
7471,
antiseize,
bicycle,
bicycle assembly,
C5-A,
chemicals,
forums.mtbr.com,
forums.roadbikereview.com,
how to put a bike together,
loctite,
MSDS,
MTB,
MTBR,
primer,
road bike,
threadlocker
Monday, March 12, 2012
Disinfect your cycling clothing before the 2012 season starts! Dettol
Do you suffer from adult diaper rash from cycling? Chafing? Use a laundromat or public washing machine in your apartment? You need to read this.
Other than mentioning that you need to keep up on your personal hygiene. You also need to be careful with your clothing so they are actually clean.
Take all your riding gear and throw it in the wash again. When washing in the rinse cycle add in this:
DETTOL® Disinfectant Liquid| Surface Disinfection

This is especially important for mountain biking gear. And if you use a laundry mat. Athletic clothing is supposed to be washed in warm or cold water. But warm or cold water is not hot enough to kill bacteria or virus. Tide/Sunlight etc can't kill the bacteria or virus. Bleech can, but bleech harms your clothes.
When mountain biking you sometimes go through areas of soil that can be contaminated with very powerful bad bacteria. I had a small cut on my finger prior to going out for a ride once and it would not heal as the infection wouldn't go away. I had to go to the doctor for oral antibiotics and topical antibiotics. This area was fresh cut single track with a weird rotting smell...
So add Dettol in 40ml of dettol antiseptic liquid to rinse cycle. (the same spot you add in fabric softener). Or use a downy ball.

If your washing machine has extra rise cycle. Use that to thoroughly rinse the dettol away.
Other than mentioning that you need to keep up on your personal hygiene. You also need to be careful with your clothing so they are actually clean.
Take all your riding gear and throw it in the wash again. When washing in the rinse cycle add in this:
DETTOL® Disinfectant Liquid| Surface Disinfection
This is especially important for mountain biking gear. And if you use a laundry mat. Athletic clothing is supposed to be washed in warm or cold water. But warm or cold water is not hot enough to kill bacteria or virus. Tide/Sunlight etc can't kill the bacteria or virus. Bleech can, but bleech harms your clothes.
When mountain biking you sometimes go through areas of soil that can be contaminated with very powerful bad bacteria. I had a small cut on my finger prior to going out for a ride once and it would not heal as the infection wouldn't go away. I had to go to the doctor for oral antibiotics and topical antibiotics. This area was fresh cut single track with a weird rotting smell...
So add Dettol in 40ml of dettol antiseptic liquid to rinse cycle. (the same spot you add in fabric softener). Or use a downy ball.
If your washing machine has extra rise cycle. Use that to thoroughly rinse the dettol away.
Thursday, March 8, 2012
weighed: Continental RaceKing Supersonic 2.2 (26")
Tuesday, March 6, 2012
Part 3 - How to apply the various chemicals used for assembly a bike
Using loctite threadlocker products:
For Assembly
MOST IMPORTANTLY, install your parts on a clean bike with clean parts. If your bike is caked in mud or you are reinstalling old parts, take the time to wash everything with plenty of hot soapy water and towel dry them. The last thing you want is bearings to be contaminated in sand and dirt and threads to be full of grime while trying to torquing something down. An old tooth brush, dawn dish detergent, and elbow grease works wonders.
Next post: Part 4: Antiseize
For Assembly
- For best results, clean all surfaces (external and internal) with a LOCTITE® cleaning solvent and allow to dry.
- If the material is an inactive metal or the cure speed is too slow, apply all threads with primer and allow to dry.
- For low strength threadlocker such as 222MS, 220, and you have aluminum fasteners, or titanium fasteners this is a must.
- Loctite 7088 (glue stick format)
- Click on the link on how to use. Since it's gel state its application and threadlocker is different than normal
- Loctite 7471
- Loctite 7649
- Just remember, if you spent thousands of dollars on your bike, doing things right is worth the 12 dollars or so you will spend on the primer.
- Shake the product thoroughly before use.
- To prevent the product from clogging in the nozzle, donot allow the tip to touch metal surfaces during application.
- For Thru Holes, apply several drops of the product onto the bolt at the nut engagement area.
- For Blind Holes, apply several drops of the product tothe lower third of the internal threads in the blind hole, or the bottom of the blind hole.
- For Sealing Applications, apply a 360° bead of product to the leading threads of the male fitting, leaving the first thread free. Force the material into the threads tothouroughly fill the voids. For bigger threads and voids,adjust product amount accordingly and apply a 360°bead of product on the female threads also.
- Assemble and tighten as required.
- Remove with standard hand tools.
- In rare instances where hand tools do not work because of excessive engagement length, apply localized heat to nut or bolt to approximately 250 °C. Disassemble while hot. Example tool: Use a soldering iron and hold the tip of the soldering iron onto the head of the bolt to be removed and then loosen the fastener.
- Apply localized heat to the assembly to approximately 250 °C. Disassemble while hot.
- Cured product can be removed with a combination of soaking in a Loctite solvent and mechanical abrasion such as a wire brush. (solvent such as Acetone)
MOST IMPORTANTLY, install your parts on a clean bike with clean parts. If your bike is caked in mud or you are reinstalling old parts, take the time to wash everything with plenty of hot soapy water and towel dry them. The last thing you want is bearings to be contaminated in sand and dirt and threads to be full of grime while trying to torquing something down. An old tooth brush, dawn dish detergent, and elbow grease works wonders.
Next post: Part 4: Antiseize
Labels:
222MS,
243,
262,
7471,
antiseize,
bicycle,
bicycle assembly,
C5-A,
chemicals,
forums.mtbr.com,
forums.roadbikereview.com,
how to put a bike together,
loctite,
MSDS,
MTB,
MTBR,
primer,
road bike,
threadlocker
Thursday, March 1, 2012
Part 2 - The arguement for using threadlocker vs Antisieze in almost all areas
The last post talked about what each chemical does. I also included the material safety data sheet with each chemical/compound. Please read those as they are important for your long term health.
The theory behind using antiseize and/or threadlocker:
Antiseize
There are people who claim the only way to install titanium fasteners or specialty fasteners is to use antiseize. The arrangement is that antiseize prevents galling of the threading surfaces and prevents galvanic corrosion between titanium and aluminum. The galling occurs when two untreated metals surfaces are slid together under high pressure and force. Antiseize also "buffers" the two reactive metals by providing a sacrificial metal in the grease to use.
Threadlocker (aka Loctite)
To some it may come as a surprise. But in our applications (bicycles) threadlocker can be substituted in almost all cases (except for lubricating the cassette lockring or Shimano centreloc lock ring).
Why?
Threadlocker will also prevent galvanic corrosion between two metal surfaces just fine. When threadlocker fully cures. The cured loctite gel/liquid becomes an acrylic layer that isolates the two metal surfaces preventing galvanic corrosion.
In my professional experience as an aerospace engineer, when given the choice between threadlocker (aka loctite) is a better compound to threat threaded fasteners than antiseize for high performance applications.The benefit of using threadlocker is that is also acts as a secondary locking feature which is a back up against the fastener loosing tension (aka losing torque). Pretty much everything on our bicycle is a safety critical interface. Wherein if a stem bolt loosens there is a good chance your handlebar will coming flying off and you go flying off and crash. The brake rotor bolts holding your brake rotor. The bolts holding the caliper to the frame or fork... etc... the list goes on. So why not increase the safety and reliability of your bicycle by using threadocker?
Stay tuned for Part 3 - How to apply the various chemicals used for assembly a bike
The theory behind using antiseize and/or threadlocker:
Antiseize
There are people who claim the only way to install titanium fasteners or specialty fasteners is to use antiseize. The arrangement is that antiseize prevents galling of the threading surfaces and prevents galvanic corrosion between titanium and aluminum. The galling occurs when two untreated metals surfaces are slid together under high pressure and force. Antiseize also "buffers" the two reactive metals by providing a sacrificial metal in the grease to use.
Threadlocker (aka Loctite)
To some it may come as a surprise. But in our applications (bicycles) threadlocker can be substituted in almost all cases (except for lubricating the cassette lockring or Shimano centreloc lock ring).
Why?
- because we don't care about high temperature applications
- because we don't care about high torque applications (think bolts that are the size of your arm).
Threadlocker will also prevent galvanic corrosion between two metal surfaces just fine. When threadlocker fully cures. The cured loctite gel/liquid becomes an acrylic layer that isolates the two metal surfaces preventing galvanic corrosion.
In my professional experience as an aerospace engineer, when given the choice between threadlocker (aka loctite) is a better compound to threat threaded fasteners than antiseize for high performance applications.The benefit of using threadlocker is that is also acts as a secondary locking feature which is a back up against the fastener loosing tension (aka losing torque). Pretty much everything on our bicycle is a safety critical interface. Wherein if a stem bolt loosens there is a good chance your handlebar will coming flying off and you go flying off and crash. The brake rotor bolts holding your brake rotor. The bolts holding the caliper to the frame or fork... etc... the list goes on. So why not increase the safety and reliability of your bicycle by using threadocker?
Stay tuned for Part 3 - How to apply the various chemicals used for assembly a bike
Labels:
222MS,
243,
262,
7471,
antiseize,
bicycle,
bicycle assembly,
C5-A,
chemicals,
forums.mtbr.com,
forums.roadbikereview.com,
how to put a bike together,
loctite,
MSDS,
MTB,
MTBR,
primer,
road bike,
threadlocker
Wednesday, February 29, 2012
Part 1 - Introduction: The various chemicals used for assembly a bike
A four part post series on the basics of using engineering compounds in high performance applications.
So the parts are coming in slowly for my Element Team RSL build up. Let's cover how to properly assembly your bicycle at the very beginning. Doing a proper build from the beginning ensure reliability at the end. DNF at a race because you had a mechanical is not the way to win. You have to finish in order to win.
You may not realize this, but many of the research and development done for aerospace applies directly to your high performance bicycle. Bicycles these days rely heavily on carbon fibre, high strength aluminum alloy, titanium fasteners, to keep the weight down but the performance up.
Here are the 6 main chemicals/compounds needed to assemble the basics on your bike.
From left to right:
Isopropyl Alcohol (99%)
MSDS Isopropyl 99%
Used to clean parts prior to assembly. Wet paper towels, q-tips to clean surfaces and threads.
Loctite 7471 (aka primer)
MSDS 7471
LOCTITE® 7471™ is used where increased cure speed of LOCTITE® anaerobic products is required. It is especially recommended for applications with passive metals or inert surfaces and with large bond gaps. LOCTITE® 7471™ is particularly recommended when prevailing temperature is low (<15 °C).
Loctite 222MS - This will be your most commonly used thread locking compound for bicycles
MSDS 222MS
LOCTITE® 222MS™ is designed for the locking and sealing of threaded fasteners which require easy disassembly with standard hand tools. The product cures when confined in the absence of air between close fitting metal surfaces and prevents loosening and leakage from shock and vibration. Particularly suitable for applications such as adjustment of set screws, small diameter or long engagement length fasteners, where easy disassembly is required without shearing the screw. The thixotropic nature of LOCTITE® 222MS™ reduces the migration of liquid product after application to the substrate.
Note the MS suffix just denotes it meets military specifications.
Loctite 243- rarely used on bicycles
MSDS 243
The use is the same as the above Loctite 222MS, but for areas where high strength is required or in cases where the diameter of the threaded bolt is larger than say M8.
Loctite 252 (never used on a bicycle)
MSDS 252
This version of loctite (aka red) is never used for bicycles. It is permanent strength for small diameter fasteners and will cause small fasteners to snap off if taken apart with hand tools. To remove fasteners with permanent strength applied loctite requires heating of the fastener to melt the loctite. The only time I've used this for bicycles is for my Titanium Lynskey hard tail. Where the internal diameter of the seatpost is set for 31.6mm via an aluminum shim pressed inside the titanium seattube. The shim either was not properly manufactured or wore and creating a creaking noise every single time I touched the saddle. So I removed the crank and bottle bracket, the seatpost. hung the bicycle upside down and drenched the inside of the seattube with loctite to let it wick between the shim and the seatpost tube. Creak went away after that.
Anti-seize compound. (basically grease with reactive metal flakes inside)
MSDS loctite C5-A
LOCTITE® C5-A® Copper Grade Anti-Seize Stick provides a shield against high temperature seizing and galling. All mated parts, studs, bolts, flanges and gaskets, remove more easily and in cleaner and better condition. This product can be used on copper, brass, cast iron, steel, all alloys including stainless steel, all plastics and all non-metallic gasketing materials. Typical applications include original equipment and maintenance, and equipment associated with petroleum chemicals, steel mills, power plants, marine and foundries. This product is typically used in applications up to 982 °C.
The metal flakes inside the grease (copper or zinc or silver) acts as the sacrificial metal between two metals where one is more reactive than the other. Without the use of antiseize or some other form of thread treatment two metals will fuse together over time and form an oxide layer between them. Preventing removal of the fasteners.
So the parts are coming in slowly for my Element Team RSL build up. Let's cover how to properly assembly your bicycle at the very beginning. Doing a proper build from the beginning ensure reliability at the end. DNF at a race because you had a mechanical is not the way to win. You have to finish in order to win.
You may not realize this, but many of the research and development done for aerospace applies directly to your high performance bicycle. Bicycles these days rely heavily on carbon fibre, high strength aluminum alloy, titanium fasteners, to keep the weight down but the performance up.
Here are the 6 main chemicals/compounds needed to assemble the basics on your bike.
From left to right:
Isopropyl Alcohol (99%)
MSDS Isopropyl 99%
Used to clean parts prior to assembly. Wet paper towels, q-tips to clean surfaces and threads.
Loctite 7471 (aka primer)
MSDS 7471
LOCTITE® 7471™ is used where increased cure speed of LOCTITE® anaerobic products is required. It is especially recommended for applications with passive metals or inert surfaces and with large bond gaps. LOCTITE® 7471™ is particularly recommended when prevailing temperature is low (<15 °C).
- inactive metals are non ferrous metals such as titanium, aluminum, black oxide coated steel fasteners, and certain stainless steel alloys.
- When using loctite 222 (low strength) thread locking compound, its formulation requires primer for in-active metals. Current formulations of 243 and 252 do not require primer for in-active metals.
Loctite 222MS - This will be your most commonly used thread locking compound for bicycles
MSDS 222MS
LOCTITE® 222MS™ is designed for the locking and sealing of threaded fasteners which require easy disassembly with standard hand tools. The product cures when confined in the absence of air between close fitting metal surfaces and prevents loosening and leakage from shock and vibration. Particularly suitable for applications such as adjustment of set screws, small diameter or long engagement length fasteners, where easy disassembly is required without shearing the screw. The thixotropic nature of LOCTITE® 222MS™ reduces the migration of liquid product after application to the substrate.
Note the MS suffix just denotes it meets military specifications.
- Bicycle applications applications include:
- brake rotor bolts
- shift lever/brake lever clamping bolts (remember the old school MTB trick to tighten very lightly the clamps so the brake lever and shifter can rotate during a crash. The loctite 222 will allow the bolt to retain the tension and not loosen over time i.e. during a race).
- brake bolts for IS mount or Post mounts
- hub pre-load collars
- water bottle cage bolts
- stem bolts
- seatpost collar/binder bolt
Loctite 243- rarely used on bicycles
MSDS 243
The use is the same as the above Loctite 222MS, but for areas where high strength is required or in cases where the diameter of the threaded bolt is larger than say M8.
- Bicycle applications include:
- Crank arm pinch bolts on non drive side
- Crank arm fixing cap bolt that hold the non-drive side crankarm onto the spindle/axle
- Crank bolts (bolts that hold the arms onto the axle of the bottom bracket)
- ISIS
- Square taper
- Cannondale Si version cranksets
- Any poorly designed part that constantly loosens over time
Loctite 252 (never used on a bicycle)
MSDS 252
This version of loctite (aka red) is never used for bicycles. It is permanent strength for small diameter fasteners and will cause small fasteners to snap off if taken apart with hand tools. To remove fasteners with permanent strength applied loctite requires heating of the fastener to melt the loctite. The only time I've used this for bicycles is for my Titanium Lynskey hard tail. Where the internal diameter of the seatpost is set for 31.6mm via an aluminum shim pressed inside the titanium seattube. The shim either was not properly manufactured or wore and creating a creaking noise every single time I touched the saddle. So I removed the crank and bottle bracket, the seatpost. hung the bicycle upside down and drenched the inside of the seattube with loctite to let it wick between the shim and the seatpost tube. Creak went away after that.
Anti-seize compound. (basically grease with reactive metal flakes inside)
MSDS loctite C5-A
LOCTITE® C5-A® Copper Grade Anti-Seize Stick provides a shield against high temperature seizing and galling. All mated parts, studs, bolts, flanges and gaskets, remove more easily and in cleaner and better condition. This product can be used on copper, brass, cast iron, steel, all alloys including stainless steel, all plastics and all non-metallic gasketing materials. Typical applications include original equipment and maintenance, and equipment associated with petroleum chemicals, steel mills, power plants, marine and foundries. This product is typically used in applications up to 982 °C.
The metal flakes inside the grease (copper or zinc or silver) acts as the sacrificial metal between two metals where one is more reactive than the other. Without the use of antiseize or some other form of thread treatment two metals will fuse together over time and form an oxide layer between them. Preventing removal of the fasteners.
- Bicycle Applications include:
- We mainly use antiseize for bolts that are dissimilar metals to prevent galvanic corrosion between the two metals and to prevent galling between male and female threads. Galling can be described as the cold welding of two naked metals surfaces when slid together under high pressure and force. Example brand new titanium frame with freshly cut BSA threads for BB cups. Aluminum bottom bracket cups. The two not having any threadlocker or antiseize and you installing the cup into the frame dry. You will never be able to remove the two without destroying 1 set of threads and having to chase the frame's bottom bracket shell with a tap.
- areas of use:
- stem bolts
- cassette lockring
- titanium fasteners
- threaded bottom bracket cups
Labels:
222MS,
243,
262,
7471,
antiseize,
bicycle,
bicycle assembly,
C5-A,
chemicals,
forums.mtbr.com,
forums.roadbikereview.com,
how to put a bike together,
loctite,
MSDS,
MTB,
MTBR,
primer,
road bike,
threadlocker
Tuesday, February 14, 2012
Friday, February 10, 2012
Fox Canada aka AuroraActionSports order has arrived
A couple of days ago I posted about Fox Canada blow out sale.
http://www.hackracer.com/2012/02/fox-canada-blow-out-sale.html
www.auroraactionsports.ca/
I love ordering over the internet. Receiving packages is like receiving mini Christmas gifts.
Some fine deals guys and gals. Being an avid http://www.redflagdeals.com/ supporter for 6 or so years this is worthy of posting there. I will let the cycling community vultures pick at the inventory for a bit before I post there though.
First off, free shipping over $150. Sold in Canada and shipped out of Canada with USA level pricing. For once it is nice not to be gouged with brokerage fees by couriers and post offices. What you paid for is final. The UPS man won't ask for 50 dollars on a 20 dollar shipment, Canada Post will not ask you for a 8 dollar brokerage fees...
What I got:
Unfortunately the current edition of the Fox Unabomber glove was no longer available ($25), so they refunded me that and the tax and the total came out to be around $143. Package arrived on Wednesday and they shipped it out Monday.
I'm a huge fan of the old original Unabomber Glove. I have worn out 1 pair of them already over the years, the current pair I have is starting to rip apart at the seems around the palm areas. Mind you they have gone through 100s of rides and since they are my favorite they get used all the time. They also get washed after every use in the laundry machine.
Unfortunately Fox decided to update their design so that this version is now discontinued. hence why I loaded up on 4 pairs. The reason why I love them so much other than the fact they fit absolutely perfectly on my hands is that because they are lightweight. Not overly padded. Protection on the knuckles that get exposed when you grab the bars near the edge. Best glove ever designed in my opinion.
The Jersey was not bad. The fit is the same as a Louis Garneau racer fit Large. The road glove fits just as nice as the Una-bomber. Perfect for those who like thin to no padding for their road bike gloves.
If you want some Fox clothing for amazing prices don't hesitate. You won't be finding these prices unless you find sales in the USA at local bike stores. Then you have to worry about shipping and cross boarded taxes/brokerage fees.
If you are into GoKarts there are some wicked deals on old "SPRINT" clothing that Fox made in the past. This stuff is circa 2004. But who cares. $40 bucks or so for a kart jacket, $30 or so for Nomex gloves. Beats paying hundreds for Sparco.
http://www.hackracer.com/2012/02/fox-canada-blow-out-sale.html
www.auroraactionsports.ca/
I love ordering over the internet. Receiving packages is like receiving mini Christmas gifts.
Some fine deals guys and gals. Being an avid http://www.redflagdeals.com/ supporter for 6 or so years this is worthy of posting there. I will let the cycling community vultures pick at the inventory for a bit before I post there though.
First off, free shipping over $150. Sold in Canada and shipped out of Canada with USA level pricing. For once it is nice not to be gouged with brokerage fees by couriers and post offices. What you paid for is final. The UPS man won't ask for 50 dollars on a 20 dollar shipment, Canada Post will not ask you for a 8 dollar brokerage fees...
What I got:
| Part | Description | Price | Qty | Subtotal |
| 24069-001016 | Unabomber Glove | $19.00 | 2 | $38.00 |
| 24069-008016 | Unabomber Glove | $19.00 | 2 | $38.00 |
| 24094-186016 | Fox Reflex Gel Short | $19.00 | 1 | $19.00 |
| 24101-103016 | Fox Unabomber Glove | $25.00 | 1 | $25.00 |
| 23140-001005 | Fox Performance Race S/S Jersey | $31.00 | 1 | $31.00 |
| Item Total: | $151.00 | |
| Shipping Cost: | $0.00 | |
| Subtotal: | $151.00 | |
| Tax (13%): | $19.63 | |
| Total: | $170.63 | |
Unfortunately the current edition of the Fox Unabomber glove was no longer available ($25), so they refunded me that and the tax and the total came out to be around $143. Package arrived on Wednesday and they shipped it out Monday.
I'm a huge fan of the old original Unabomber Glove. I have worn out 1 pair of them already over the years, the current pair I have is starting to rip apart at the seems around the palm areas. Mind you they have gone through 100s of rides and since they are my favorite they get used all the time. They also get washed after every use in the laundry machine.
Unfortunately Fox decided to update their design so that this version is now discontinued. hence why I loaded up on 4 pairs. The reason why I love them so much other than the fact they fit absolutely perfectly on my hands is that because they are lightweight. Not overly padded. Protection on the knuckles that get exposed when you grab the bars near the edge. Best glove ever designed in my opinion.
The Jersey was not bad. The fit is the same as a Louis Garneau racer fit Large. The road glove fits just as nice as the Una-bomber. Perfect for those who like thin to no padding for their road bike gloves.
If you want some Fox clothing for amazing prices don't hesitate. You won't be finding these prices unless you find sales in the USA at local bike stores. Then you have to worry about shipping and cross boarded taxes/brokerage fees.
If you are into GoKarts there are some wicked deals on old "SPRINT" clothing that Fox made in the past. This stuff is circa 2004. But who cares. $40 bucks or so for a kart jacket, $30 or so for Nomex gloves. Beats paying hundreds for Sparco.
Labels:
Canada,
cycling accessories,
deals,
Fox,
fox canada,
Fox clothing sale,
FOX sale,
gloves,
http://www.auroraactionsports.ca,
MTB,
MTBR,
RBR,
road,
sale,
www.auroraactionsports
Location:
Aurora, ON L4G 3V2, Canada
Monday, February 6, 2012
Saturday, February 4, 2012
weighed: Tune 'Wassertrager' Carbon Cage
Saturday, January 28, 2012
weighed: Selle Italia SLR Fibre Carbon Rail Saddle
Labels:
carbon,
fibre,
mass,
MTBR,
rail,
saddle,
selle italia,
slr,
Weight Weenie
Thursday, January 26, 2012
weighed: ESI Silicone "Chunky" MTB grips
ESI 100% Silicone MTB Grips
Best shock absorbing grip in the industry!
| ESI "Chunky" MTB grips. (Claimed weight 60 grams) |
Wednesday, January 18, 2012
a Foxy Fork - a black F100 RLC Fit QR15 beauty
The fork chosen for my Rocky Mountain build took some while to find. Aesthetics in my opinion is just as important as a light bike. What we have here is a black 2011 Fox F100 RLC FIT, tapered steerer tube (1 1/8 "to 1.5"), QR15 fork. This fork is not normally available at the retail level as black F32 series forks were only available as original equipment manufacturer (OEM) offering. Meaning sold to bicycle companies to include with their frames as complete bikes. I've seen these black OEM ones go on ebay for anywhere from 250 USD to 700 USD. I unfortunately missed out one that went only for 300 USD brand new. This one I purchased from www.calgarycycleonline.com/. I've purchased many parts on closeout from them in past. Keep an eye out, you may see something you like for a crazy deal.
Fox lists a F32 F100 RLC Fit w/ taper steerer tube and QR15 lowers at 1490g. A delta of + 65g is very respectable weight, that is only a variance of ~4% over claimed weight. I've seen Fox forks be almost 200 grams over manufactured claimed weights. Perhaps the OEM forks were built with tighter quality assurance during the initial manufacturing ramp. A lot of times companies will screen and pay attention to yield and adherence to specifications more during initial stages of production and stop or lesson their monitor once they are producing in high volume... Nevertheless I'm very happy.
The only thing missing from this fork is the Kashima coating. Kashima coating was not offered to OEM Fox Forks in 2011. It wasn't until 2012 that OEMs could get Fox forks with the special super slick coating.
Last but not least here is the Fox QR15 skewer made by Shimano.
Fox lists a F32 F100 RLC Fit w/ taper steerer tube and QR15 lowers at 1490g. A delta of + 65g is very respectable weight, that is only a variance of ~4% over claimed weight. I've seen Fox forks be almost 200 grams over manufactured claimed weights. Perhaps the OEM forks were built with tighter quality assurance during the initial manufacturing ramp. A lot of times companies will screen and pay attention to yield and adherence to specifications more during initial stages of production and stop or lesson their monitor once they are producing in high volume... Nevertheless I'm very happy.
The only thing missing from this fork is the Kashima coating. Kashima coating was not offered to OEM Fox Forks in 2011. It wasn't until 2012 that OEMs could get Fox forks with the special super slick coating.
Last but not least here is the Fox QR15 skewer made by Shimano.
Tuesday, January 17, 2012
QR15 roof rack? No such thing. You need an adapter. Filzer QR15 adapter review
Do transport your bikes via a roof rack? Are they fork mounted? Do you enjoy mountain biking? Sooner or later you will be getting a bike with a fork that uses a through axle. Currently none of the rack manufacturers offer a fork mounted through axle bike rack. Not rockymounts, not Yakima, not Thule. Unless you go with one of the racks that holds your bikes via the front and rear wheel.
Personally after using one of those two wheel racks, I don't like them. At highway speeds the bike buffets in the two wheel racks. Combined the fact you may be late to the race start and you are travelling at warp speed trying to get there doesn't help.
Currently two companies offer adapters to allow you to mount a through axle bike to a 9mm QR rack. www.hurricanecomponents.com/ and http://www.filzer.com/
This review is for the Filzer Fork Adapter 15mm (FA-15). I purchased it from http://www.mec.ca/ for $25 CDN. A great shop for Canadians.
The main purpose of buying a QR15 adapter for me was to allow me to use my current work stand for my new build. I have a Tacx Spider Team T3050 work stand. A great stand that I have used for the last 5 years. It unfortunately uses 9mm QRs to secure the bike to the stand. So I needed a fork adapter.
Build quality I would rate it as average. Just a bunch of steel plates and steel tubes welded together. My concern was the finish on the two ends of the tubes which will contact the fork. When purchasing the part at MEC, I went through all the adapters on the shelf to find one that didn't have paint dripping to the ends of the tubes, and all the machining burrs were removed. Many were not. So be careful.
Also the tubing inner diameter has a loose tolerance with the QR15 axle. The QR15 axle is designed to be in double sheer. So the loads from the wheel gets transferred to the axle and to the fork at two areas. With a loose fit the loads will cause wear on the axle. A better design would have the inner diameter of the tubing be reemed and in close tolerance with the QR15 axle similar to the inner diameter of your fork. With this adapter, the play in the end is being taken away by adjusting the preload on the axle when you cinch the QR cam's down.Then the loads are transferred at the two ends of the tube where there is little surface area creating a critical slip joint. Not what a QR15 axle is designed to do. That is what 9mm QRs are meant to do. In my opinion you will quickly wear the fork's axle area if used on your rack.
In the end the real purpose for me buying the adapter was to use it on my stand.
Overall rating 5/10
Pros:
-Cost effective adapter
-good availability (available through MEC and Amazon.com)
-will work great for Park and Tacx Euro-style work stands
Cons:
-average quality
-poor design - most likely will cause unnecessary wear on your fork during transport.
Personally after using one of those two wheel racks, I don't like them. At highway speeds the bike buffets in the two wheel racks. Combined the fact you may be late to the race start and you are travelling at warp speed trying to get there doesn't help.
Currently two companies offer adapters to allow you to mount a through axle bike to a 9mm QR rack. www.hurricanecomponents.com/ and http://www.filzer.com/
This review is for the Filzer Fork Adapter 15mm (FA-15). I purchased it from http://www.mec.ca/ for $25 CDN. A great shop for Canadians.
The main purpose of buying a QR15 adapter for me was to allow me to use my current work stand for my new build. I have a Tacx Spider Team T3050 work stand. A great stand that I have used for the last 5 years. It unfortunately uses 9mm QRs to secure the bike to the stand. So I needed a fork adapter.
Build quality I would rate it as average. Just a bunch of steel plates and steel tubes welded together. My concern was the finish on the two ends of the tubes which will contact the fork. When purchasing the part at MEC, I went through all the adapters on the shelf to find one that didn't have paint dripping to the ends of the tubes, and all the machining burrs were removed. Many were not. So be careful.
Also the tubing inner diameter has a loose tolerance with the QR15 axle. The QR15 axle is designed to be in double sheer. So the loads from the wheel gets transferred to the axle and to the fork at two areas. With a loose fit the loads will cause wear on the axle. A better design would have the inner diameter of the tubing be reemed and in close tolerance with the QR15 axle similar to the inner diameter of your fork. With this adapter, the play in the end is being taken away by adjusting the preload on the axle when you cinch the QR cam's down.Then the loads are transferred at the two ends of the tube where there is little surface area creating a critical slip joint. Not what a QR15 axle is designed to do. That is what 9mm QRs are meant to do. In my opinion you will quickly wear the fork's axle area if used on your rack.
In the end the real purpose for me buying the adapter was to use it on my stand.
Overall rating 5/10
Pros:
-Cost effective adapter
-good availability (available through MEC and Amazon.com)
-will work great for Park and Tacx Euro-style work stands
Cons:
-average quality
-poor design - most likely will cause unnecessary wear on your fork during transport.
Sunday, January 15, 2012
2011 Rocky Mountain Element Team RSL weights
So what is the most important aspect to a self confessed weight weenie addict? The weights of course!
Weight of the frame is without seatpost binder or the rubber condom to prevent water from getting in from the seatpost/seatube interface, without water bottle cage bolts.
Labels:
2011,
element,
http://www.bikes.com/,
mass,
MTB,
MTBR,
rocky,
RSL,
scale,
Weight Weenie
Subscribe to:
Posts (Atom)