LIST

Monday, January 30, 2012

weighed: Shimano QR15 Fox through axle

Shimano QR15 Fox through axle
Part # 820-00-374
Notes: Comes standard from Fox when purchasing a Fox QR15 fork.

Shimano 820-00-374 (FOX QR15) axle, (claimed: unknown)


Sunday, January 29, 2012

weighed: Tune DC15 Thru Axle Skewer for FOX (QR15)

Tune DC15-FX

Tune DC15-FX (claimed 40g)
Note: Be careful which one you buy. There are three versions. FOX, RockShox, and DTswiss. You need the version that matches the make of your fork.

Saturday, January 28, 2012

weighed: Selle Italia SLR Fibre Carbon Rail Saddle

 Selle Italia SLR Fibre Carbon Rail Saddle

Selle Italia SLR Fibre Carbon Rail Saddle (Claimed 135g)

Friday, January 27, 2012

How Carbon Fibre frames are made

One method of making carbon fibre frames.


thanks for Product by Process for sharing.


weighed: Shimano Yumeya SP-81 shifter housing

Shimano Yumeya SP-81 shifter housing

Shimano SP81 shifter housing - 1.9m long, 47 grams. (24.7 grams/metre)

Shimano SP81 shifter housing - 1.9m long, 47 grams. (24.7 grams/metre)

Thursday, January 26, 2012

Wednesday, January 25, 2012

weighed: Syntace Duraflite 31.8 Carbon 600mm

Syntace Duraflite 31.8mm Carbon 600mm length

Syntace Duraflite Carbon 31.8mm @ 600mm length (claimed 143 g at 600 mm)

Retul FIT - In depth review


So you have been serious about cycling for many years. You own many high end bikes. Perhaps you are even part of the "My pedal bike is worth more than my car club" and you are looking for maximum performance. Or you are suffering from ergononmic fatigue on your bike... RETUL is your answer. This is where the pros go. So why not experience the "pro" level goodies?

For me it was a combination of all the above mentioned. What I really wanted to do was figure out exactly why my lower back screams in pain on a tough ride or a hard race. It hurts quite a bit once the kilometres pile up on the road bike. I would say around 65 to 75 kms it starts to nag with pain. Once 90 rolls around it hurts bad, enough that you make a couple of pedal strokes, coast for a bit while trying to stretch out your back. It also kills me on the 3rd lap of the Ontario cup races. It basically cries mercy.

In the very early beginning of biking I remember people telling me all sorts of various ways of setting up a bike. "if you have a high seat post you pedal more efficiently," "You should tilt the nose of the saddle forward for clearance." "You need a big saddle to bar drop to maximize aerodynamics." I think from these comments is what made me try to keep on increasing the height when I didn't need to.

So I decided to seek professional help to improve my performance. I felt that this single sore back problem was holding me back in terms of performance and results.

I researched the internet trying to figure out who were the good fitters in the Greater Toronto Area. A friend suggested a guy based out of Guelph university who specializes in the Serrota fit system. I contacted him, but he was only doing fits for people wanting to buy a serotta bike.

So then with more searching I found Ian MacLean who runs http://www.imfit.ca/ and is certified on the RETUL system.

The RETUL system measures your body movements under load to determine you fit. It doesn't use static position or employ the KOP system (Knee over pedal).

 
It is the truest form of measurement on how your body interacts with your machinery. This is the 21st century now. We have technology and a lot of it.

Here is a youtube video on how RETUL works:


For the technical geeks out there. The Retul system uses IR LEDs that are placed on the pivot locations of your body. The locations are:

  • Widest spot on your shoe just outside of your little toe
  • One spot near your heal just aft of the buckle for shoe
  • The bump on your ankle
  • The bump on the outside of your knee to the side
  • Your hip right at the pivot spot is for your leg
  • Shoulder
  • Elbow
  • Wrist
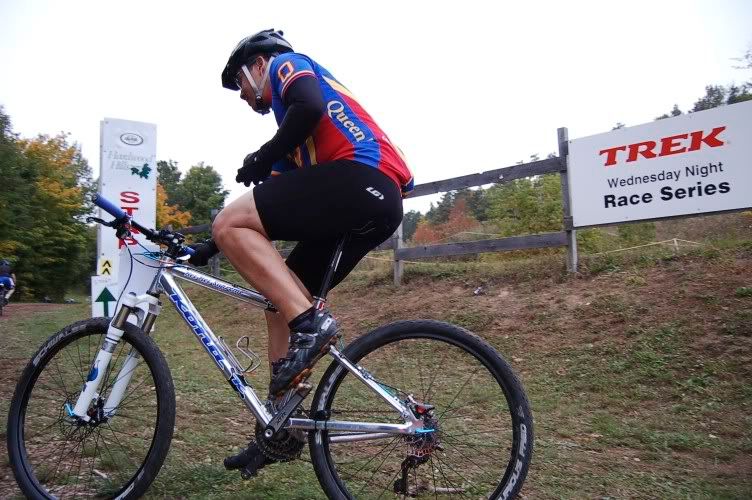
I didn't have the luxury of an assistant with my camera and I was paying money for Ian's time so there were no photos of me during the fit session. So I'm going to steal photos from around the internet.


The IR LEDs are all in a chain on a USB cable that plugs into a laptop running Retul Software (back in 2008). The new RETUL fit systems have moved onto the IR LEDs plugged into a wireless transmitter you clip to your back pocket. The actual little IR LEDs are secured inside a little 25 cent sized plastic housing that has a velco backing. The opposite velco is what gets placed on your body with a sticky backing. Then there is a camera head mounted on a tri pod about 7 to 8 feet away. This camera head is similar to the 3D scene cameras used for many robotic vision systems. This one is about 30 to 35 inches long and I believe it has 4 or 5 IR sensors in it. I forget.


The camera/tripod is placed so that it views you from the side. From what I can gather, the 4 or 5 IR sensors are able to triangulate the IR LEDs in 3D space to map out the motions of your body as you pedal your bike. (Basically how XBOX 360 kinetic works) Your bike is placed on a trainer and you are instructed to pedal as you would trying to follow a fast group ride on the flats. So about 250 to 300 watts at 100 rpms average.

So before all this, an assessment is made on your flexibility after you have warmed up on the bike. Apparently I have very good hamstring flexibility as Ian was able push my leg beyond 90 degrees with the table I was lying on with the other leg flat on the table. However my hip flexibility was below average. Imagine using both your hands to hug your knee into your chest. I was not able to bring my knee close to my chest. This raised some concern for him for fitting the road bike as hip flexibility is quite important. He taught me some after ride stretches to help increase my mobility/flexibility. Over time he said it should improve a little. Since doing this RETUL fit session back in 2008, I did 1 full year of yoga 2 times a week. Out of all the stretching and other exercise. I can honestly say YOGA is the way to go for flexibility improvement. More on that another day.

Ian looks over your bikes to see the general setup. He remarked at my slightly tilted back saddle (nose pointing up slightly). He said that was very very good. Any saddle that needs to be tilted nose down to be comfortable is the wrong saddle for the rider and he/she needs to find a different model or make. I asked him to go in more detail. He said the saddle serves to support your weight just like the pedals, and the handle bars. If you nose down the saddle you are constantly fighting your body not to slide off your saddle. You fatigue your body by using more of your legs to hold you up (pressure on pedal) and your hands/arms to hold you up. It is wasted energy. To all the male riders out there, a saddle pointed up at the nose will not cause you to go numb or make you sterile. That is a bunch of BS!

So back to the bike. Once you get to quick pace (100 rpm, 250 watts), the program records the IR LED movements. Real time it displaces a stick figure on the computer screen animated your body with the pivot locations. Then once the recording stops (about 20 to 30 seconds), a table is presented with the various metrics. Metrics such as knee angles at X degree of crank, knee angle flexion, ankle angle range, etc... Ian looks at these and starts assessing what should be adjusted on the bike to correct these values. I believe he works from both experience, and what Retul recommends.

Not so good Knee trace, notice the doughnuts
 
1st adjustment - saddle. My saddle is too high on the road bike. So high that I was adjusting saddle forward to try to reduce the strain on my hamstrings. Ian lowered the saddle, and took another data run. He still was not happy. Too high. We must have lowered it 1 to 1.5 inches. He studied the knee tracing which is similar to a hysteresis plot of how your knee is moving  through 3D space. My 1st run showed a big doughnut as my saddle was too high. It made my knee move in and out of the frame to try to compensate at the top and bottom end of the stroke. My knee also traced out at an angle. Very bad according to Ian. He believes this is a major contributing factor to my lower back pain as I was over stretching my hamstring. This then causes the hamstring to pull down on the hip flexor muscles which tie into your lower back.

2nd adjustment - saddle fore and aft. Looking at the knee plots, knee angle, hip angle, he said my saddle was now way too far forward at the new saddle height. He moved it back roughly 1.5 cm.

3rd adjustment - Cleat position. He moved my cleats slightly closer to the ankle to help the foot angle with respect to the ground. When my seat was too high my toes were always pointed to the ground. He said I had adjusted my cleat based on this incorrect pedal motion and changed it to what it should be

Much better knee trace - notice not much "doughnut"

Couple of more tweaks and we played with raising the handle bar to the max my steerer tube had to offer (which was a lot) to slamming it down. He studied something like 8 runs of data and said my inital position of just the conical spacer was perfect. Moving the handlebar up the max didn't change my hip angle. But slamming it down to the bottom closed my hips even more, and I was suffering from poor hip flexibility. So he put it back to the original as it was more aerodynamic.

Then we turned the whole setup around 180 degree to work out if I had an inconsistency between my left and right side. The only thing needed was a slightly different cleat position as my left side of my hip was even worse than my right side.

So with the adjustments made today and what I've been doing since the beginning of the season, I figure I've dropped the seatpost about 3" in total prior to the fit session..

Then measurements of my bike was recorded down. But not by a ruler. By a handheld IR remote. It is the size of a TV remote. Has 4 IR LED on the corners of the device with a cable for USB power and menu control of software. The device then has a stylus / pointer with a ball tip. This ball tip is used to locate features on the bike, with the bike placed 45 degrees to the camera about 12 feet away this time. The IR
LEDs emit to the camera which then triangulate the 4 LEDs. It is like measuring your bicycle with a Coordinate-measuring machine (CMM).


  • Point for axial line going through head set is determined by placing pointer into the stem cap bolt
  • Highest point on saddle is then taken to determine the plane in which the frame exists in 3d space
  • Then rear wheel rim is traced out with the stylus while the camera records to determine the rear axle location 
  • A chain ring bolt is used to follow the rotation of the cranks through 360 degrees, this determines Bottom bracket location of bike 
  • stylus is placed near centerline of pedal axle to determine pedal spindle location and crank length
  • the circumference of the handle bar is traced out at the stem connection to determine the length of stem (with respect to the stem cap datum).
  • stylus is ran along the brake/shift lever to determine their mounting locations and contour
  • saddle contour is also traced out along full length to determine installed aft/fore location and saddle angle
  • high points on hoods is taken to determine mounting width 
  • the upper edge of the frame's headtube is traced out so that the total stem stack height can be calculated
  • front wheel circumference is traced out to determine front axle location, rake of fork, trail of fork.
Pretty cool to have your bike CMM'd within +/- 1mm accuracy.


Most of the session was spent on my road bike. I good 2 hours worth, and about 20 or so data runs.

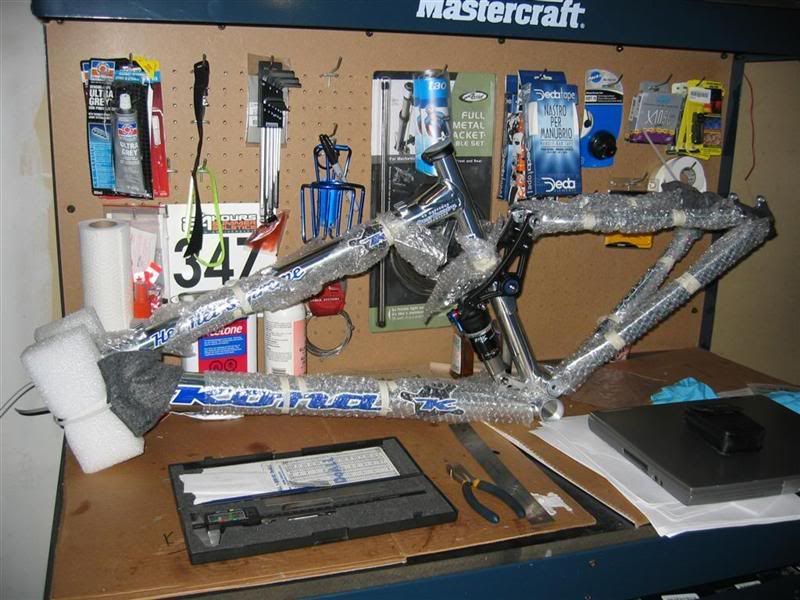
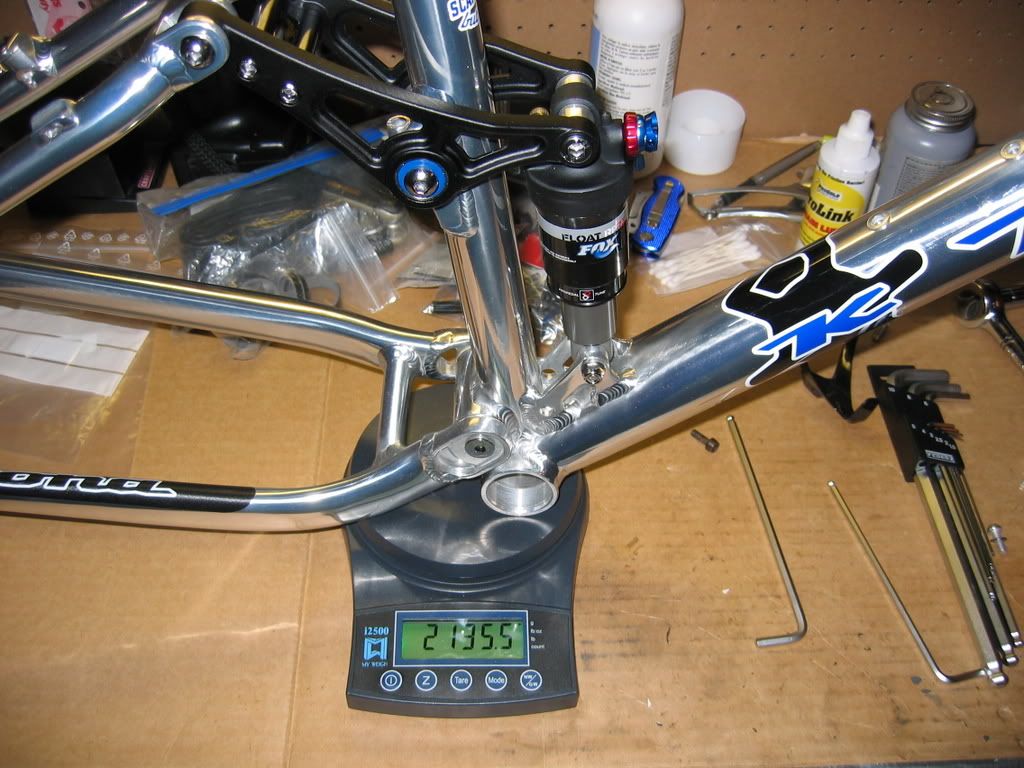
Then mountain bikes... (you will need slick mountain bike tire for your rear wheel)

The same thing happened, except I did not need to put down 300 watts I only did around 150 watts. My Kona I had to lower the seat. Fore/aft was perfect. Cleat placement was perfect. Bar to saddle drop was
perfect too, and I can go lower if I wish without impact based on the data runs.

For the Lynskey I had to raise the seatpost. Push the saddle back. a bit. It was noted that on the mountain bike my hip angle is perfect.

The mountain bikes took about 30 mins each to adjust as they were pretty bang on and the fit was very similar even though one is a hardtail and one is a full suspension. I would say the value in the mountain bike fitting is not as great as the road bike. Because you shift your weight and your body position a lot to compensate for the terrain anyways.

So what I learened. My seatposts were all too high except for the Lynskey. (I've dropped every single bikes seatposts over the months since january). My fore and aft generally was too far forward. Also to help the lower back out, Ian suggested trying to spin up a hill on the mountain bike rather than trying to hammer up it mashing on the pedals. This results in fatigue on the hip flexor muscles which are directly linked the lower back.

On the road fit. I managed to increase my pedal cadence 10 rpm, and add 60 watts of power on the particular cog I was using based on the new adjustments. I also feel better on the bike and I'm not rocking
side to side as much.

The mountain bikes... With the adjustments fore/aft and slight tweaking of the saddle angle I'm not actually sitting properly on the saddle.

Also my posture on my bikes are poor. As I need to rotate my hips in by sucking in my abs and pushing my butt out. Rather than just sitting down on the saddle and bending my torso to reach the handle bar.

Here are examples of what report comes with your session. Back in 2008 the report is not as detailed as they are now.


Money well spent? YES. It cost me $380 CDN to do 3 bikes. I occupied maybe 4.5 hours of Ian's time. As each bike had to be setup on the trainer and then flipped 180 degrees to view both left and right.

I did the Retul Fit analysis back in 2008. 2 years later I can honestly say my performance is better. My lower back is not as sore. I feel more comfortable on the bike and my riding friends tell me that I can hold a straight line perfectly line on the road bike in a draft. No rocking side to side.

We spend a lot of time on our bikes. Especially if you are dedicated to racing and/or your passion. Would you drive your car barely able see over the dash board? Would you sit in front of your computer awkwardly? Some do. Those who do ruin their backs, wrists, necks... you name it.

$250 CDN for one session for 1 bike is worth it. Especially if you one of those who has a stem on their bike worth that.

Tuesday, January 24, 2012

One damn cool mountain biking video. British Colombia at its best.


http://youtu.be/0zLuqKNKOqs

weighed: Syntace P6 Carbon HiFlex 30.9 x 400mm

Syntace P6 Carbon HiFlex, 30.9mm, 400mm

Syntace P6 carbon hiflex, 30.9mm @ 400mm (claimed Ø 30.9 mm - 213 g (400 mm))

A new bike part weight a day

Seeing how I've been swamped at work the last 2 weeks. I thought I would try to fill some content with bike part weights that I have personally weighed or have verified. I finally got the HTML script working so that I now have an auto listing of tags with "mass" in its own page Weight Weenies! Enjoy.

Thursday, January 19, 2012

Wednesday, January 18, 2012

a Foxy Fork - a black F100 RLC Fit QR15 beauty

The fork chosen for my Rocky Mountain build took some while to find. Aesthetics in my opinion is just as important as a light bike. What we have here is a black 2011 Fox F100 RLC FIT, tapered steerer tube (1 1/8 "to 1.5"), QR15 fork. This fork is not normally available at the retail level as black F32 series forks were only available as original equipment manufacturer (OEM) offering. Meaning sold to bicycle companies to include with their frames as complete bikes. I've seen these black OEM ones go on ebay for anywhere from 250 USD to 700 USD. I unfortunately missed out one that went only for 300 USD brand new. This one I purchased from www.calgarycycleonline.com/. I've purchased many parts on closeout from them in past. Keep an eye out, you may see something you like for a crazy deal.


Fox lists a F32 F100 RLC Fit w/ taper steerer tube and QR15 lowers at 1490g. A delta of + 65g is very respectable weight, that is only a variance of ~4% over claimed weight. I've seen Fox forks be almost 200 grams over manufactured claimed weights. Perhaps the OEM forks were built with tighter quality assurance during the initial manufacturing ramp. A lot of times companies will screen and pay attention to yield and adherence to specifications more during initial stages of production and stop or lesson their monitor once they are producing in high volume... Nevertheless I'm very happy.

The only thing missing from this fork is the Kashima coating. Kashima coating was not offered to OEM Fox Forks in 2011. It wasn't until 2012 that OEMs could get Fox forks with the special super slick coating.

Last but not least here is the Fox QR15 skewer made by Shimano.

Tuesday, January 17, 2012

QR15 roof rack? No such thing. You need an adapter. Filzer QR15 adapter review

Do transport your bikes via a roof rack? Are they fork mounted? Do you enjoy mountain biking? Sooner or later you will be getting a bike with a fork that uses a through axle. Currently none of the rack manufacturers offer a fork mounted through axle bike rack. Not rockymounts, not Yakima, not Thule. Unless you go with one of the racks that holds your bikes via the front and rear wheel.

Personally after using one of those two wheel racks, I don't like them. At highway speeds the bike buffets in the two wheel racks. Combined the fact you may be late to the race start and you are travelling at warp speed trying to get there doesn't help.

Currently two companies offer adapters to allow you to mount a through axle bike to a 9mm QR rack. www.hurricanecomponents.com/ and http://www.filzer.com/

This review is for the Filzer Fork Adapter 15mm (FA-15). I purchased it from http://www.mec.ca/ for $25 CDN. A great shop for Canadians.


The main purpose of buying a QR15 adapter for me was to allow me to use my current work stand for my new build. I have a Tacx Spider Team T3050 work stand. A great stand that I have used for the last 5 years. It unfortunately uses 9mm QRs to secure the bike to the stand. So I needed a fork adapter.


Build quality I would rate it as average. Just a bunch of steel plates and steel tubes welded together. My concern was the finish on the two ends of the tubes which will contact the fork. When purchasing the part at MEC, I went through all the adapters on the shelf to find one that didn't have paint dripping to the ends of the tubes, and all the machining burrs were removed. Many were not. So be careful.


Also the tubing inner diameter has a loose tolerance with the QR15 axle. The QR15 axle is designed to be in double sheer. So the loads from the wheel gets transferred to the axle and to the fork at two areas. With a loose fit the loads will cause wear on the axle. A better design would have the inner diameter of the tubing be reemed and in close tolerance with the QR15 axle similar to the inner diameter of your fork. With this adapter, the play in the end is being taken away by adjusting the preload on the axle when you cinch the QR cam's down.Then the loads are transferred at the two ends of the tube where there is little surface area creating a critical slip joint. Not what a QR15 axle is designed to do. That is what 9mm QRs are meant to do. In my opinion you will quickly wear the fork's axle area if used on your rack.  


 In the end the real purpose for me buying the adapter was to use it on my stand.


Overall rating 5/10

Pros:
-Cost effective adapter
-good availability (available through MEC and Amazon.com)
-will work great for  Park and Tacx Euro-style work stands

Cons:
-average quality
-poor design - most likely will cause unnecessary wear on your fork during transport.

Monday, January 16, 2012

This weekend's take home

Part of being a Hack Racer is never fully optimizing your body or training to be at your peak. These delicious selections should help ensure maximum difficulty in ever reaching a podium spot.

Since I was in Toronto at the biggest LCBO (Liquor control board of ontario for all the non-Ontario residents). This LCBO is located beside the LCBO distribution warehouse for all of Ontario. It has the biggest selection of Vintages collection of wines in Ontario


Several of the bottles were chosen based on the recommendation from the Globe and Mail Article I read (http://www.theglobeandmail.com/life/food-and-wine/wine/beppi-crosariol/wine-resolution-try-one-of-these-offbeat-varieties/article2296292/).

I'm a big fan of any wine that has a 85+ rating and is under $30 CDN. You usually never go wrong choosing these.

Sunday, January 15, 2012

2011 Rocky Mountain Element Team RSL weights

So what is the most important aspect to a self confessed weight weenie addict? The weights of course!

 Weight of the frame is without seatpost binder or the rubber condom to prevent water from getting in from the seatpost/seatube interface, without water bottle cage bolts.


The fix for the Kona blues... My 2012 Full suspension XC race bike

My 2012 race machine

Full suspension carbon goodness!


Stay tuned for more details.

Saturday, January 14, 2012

Custom 2007 Kona Hei Hei Supreme - Some of my past projects

My 1st true weight weenie bike. She was regrettably stolen in 2010.


Purchased August 2007 from Dukes Cycle (http://www.dukescycle.ca/) in Toronto. This Kona Hei Hei Supreme happened to be last 17" frame available by Kona as they had changed the design in 2008. It was actually missing the rear shock as it was a frame reserved for their warranty program. I remember Gary Duke owner of Duke Cycles telling me that it was missing a shock and he was trying to see if they could obtain a shocks for it directly from FOX. In the end he got Kona to supply the frame with a 2008 FOX RP23 instead of the original 2007 RP23.

The build of this bike I had planned for several months. At the time I had just gotten hooked by weight weenies on MTBR and also http://weightweenies.starbike.com/forum/ both of which I still frequent very readily. The build was planned as light as possible without resorting to exotic parts.


Ron Ruff owner of http://www.whitemountainwheels.com/ is someone I have been doing business with for a long time. I think I was one of his 1st batch of customers. My 1st wheelset he built for me was a pair of road wheels. Tune Mig70/Mig180, CX ray spokes, 2006 Reynolds DV46C rims. I took a chance with him when he was little known on the various forums on the internet, and the wheelset came out beautifully. So without a doubt I went with him a 2nd time to build the wheelset destined for this bike.

This time it would again be Tune. As I'm a huge fan of Tune parts. Some users in the various internet forums would argue that Tune is too delicate and unrealiable. But in all the years I have been using Tune I have yet to experience a failure. I have 3 sets of wheels all with Tune hubs (1 road, two mountain) and they have been rock solid. These are: Tune King/Kong in blue (took 8 months of waiting from Tune to get them at the time), Sun Ringle EQ21 rims (at the time lighter than Stan's Notubes offerings), Sapim CX ray spokes, Alloy nipples


These wheels road beautifully. in the 3 years I raced and practiced these wheels they held up perfect. Spoke tension always remained even, rim always stayed true. I did however had to have the front rim replaced by Ron after 1 year. The front tire flatted on a long rocky decent and before I could stop safety and change the tube, the rim took the abuse of several large rocks which dented and cracked the rim.

The frame was an amazingly light frame for its time. This was before the Scott Spark became popular. It is probably the last of the light weight aluminum full suspension frames before carbon became dominant.


I further lightened the frame by replacing all the stainless steel bolts with Titanium bolts. I had ordered all my bolts from Tom who runs till this date http://torontocycles.com/


I did everything possible to lighten the bike as much as possible. In this picture the original seat post binder (which was a odd size and hard to source a super light one) had it's steel bolt replaced with a titanium one and also had material removed. At the time I was doing my machinist certificate at Sheridan collage so I had access to a Mill and used a 1/4" end mill to pocket the clamp. This saved 10 grams


A 2008 Fox F80 RLC suspened the front end.This was the best of the best in 2008, an open bath air spring super plush fork. I have been been riding FOX forks since 2005.


The bike originally used KCNC for most of its supporting components. The KCNC Ti Pro Lite had just come out and was clearly the front runner in terms of light seat posts available on the market. Unfortunately as time went on the seat post proved to be too light and the Ti bolts snapped, and with new ones replaced, it still had trouble holding the saddle rails tight. It was later replaced with a Thomson Masterpiece.


The finishing touches added Alligator i-Link to accent the bike with its blue anodizing. They were light weight aluminum bead housings similar to nokons. They worked relatively well but required you to install them carefully as pinching or kinking the liner that runs inside the beads caused cable drag and poor shifting.


The finished bike hanging for the true weight.


The bike remained relatively unchanged. At the time it was stolen it had Schwalbe Racing Ralphs in the rear, and Rocket Rons in the front. The saddle became a white Selle Italia SLR Kit Carbino and it had white ESI Chunky grips to match. I had raced this bike in countless Ontario Cup races, Summer solstice 24 hour races, Hardwood Hills 8 hour races, and weekly Tuesday night Albion races. She even visited British Colombia for 3 week riding North Shore, Whistler, Revelstoke, Sunshine Coast, you name it we went there. If you ever see this bike please shoot me an email. She was a great bike, you are still missed.